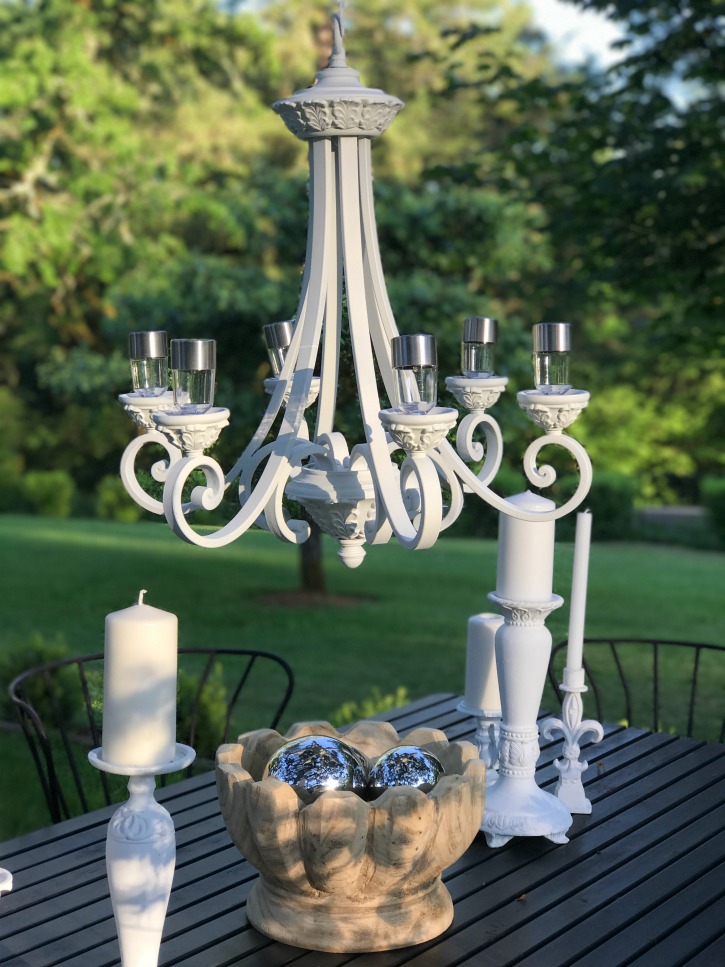
DIY Solar Light Hanging Chandelier
DIY Solar Light Hanging Chandelier is a great project because you can really add your own style to it. Picking a vintage chandelier sets yours apart from others. I will help you through the process below.

To start off you’ll want to pick out the perfect vintage chandelier.
Remove wires from the chandelier. Take off the part where the light bulbs get screwed in.
Take the stake off the bottom of solar lights, so you will just have the top by itself.
Next you are going to spray paint it. You could use any type, but for a more Shabby Chic look you can use chalk paint. If you are chalk painting you’ll want to spray a clear protective coat for outdoor use the keep your chandelier looking beautiful.
Now for putting the lights in. Make sure you remove the part that’s meant to go in the ground, so now you just have the light top. You will want industrial strength glue. Now all you need to do is glue down your lights where the light bulbs used to be.
And there you go, you have a beautiful outdoor chandelier to show off.
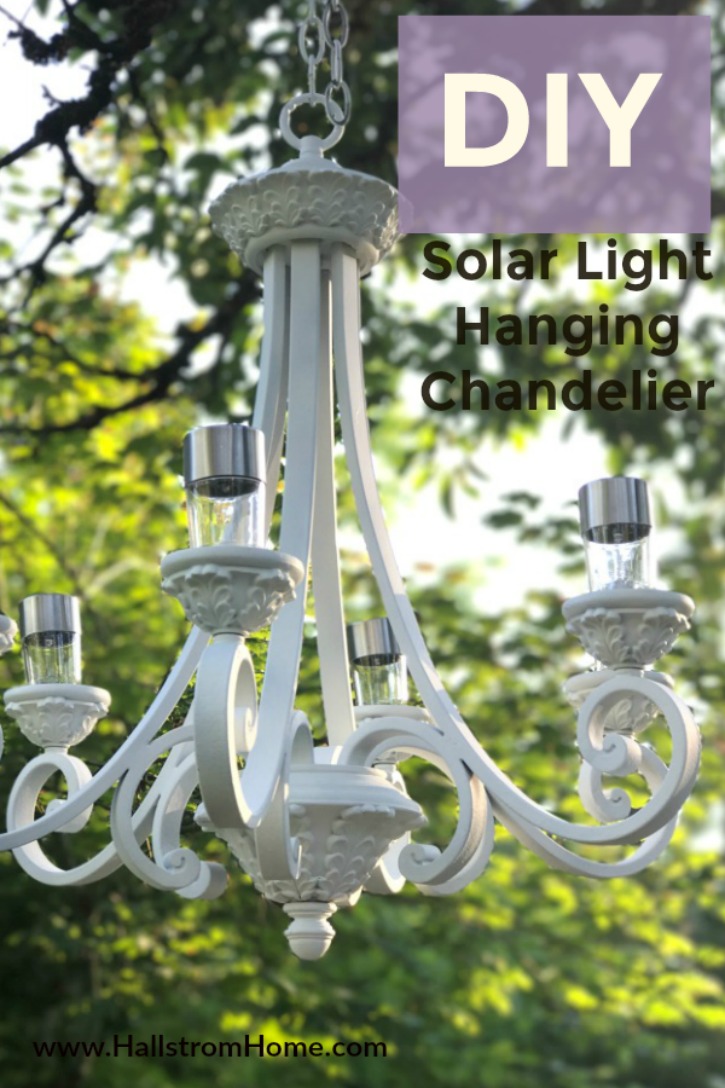
DIY Solar Light Hanging Chandelier
Just a tip, make sure to use industrial strength glue. You don’t want your light falling into your freshly baked cake. (Speaking from personal experience here.) To add even more of a shabby chic look you can distress your chandelier with some sandpaper. Rubbing in some spots to give it that chic look. If you want another look to an outdoor chandelier check out my DIY blog here. I know sometimes you guys don’t have much time to do your own DIY, which is why I put this chandelier up in my shop and you can look at my chandeliers here.
I will include some links below so you can create this same look.


I have the light fixture and the solar light but the holes where the lightbulbs went the holes are too big, what can I use to make sure that the solar lights will not lean ?
Good question, I know this might sound strange but I have used saran wrap around my candles so they fit in the candle holders, I bet if you used saran wrap and wrapped it thick enough they would stay.
Hi Rhonda! I absolutely love the look of this solar chandelier. I’ve been trying to find some solar lights for my patio, I’m so excited about this DIY. Thanks for sharing!
I’m glad you enjoy!
I really love these chandeliers and I am totally impressed with your work. Thanks a lot for sharing the great article.
I am glad you enjoy!
Rhonda
You have such great ideas! Thank you for sharing them with others. I have one I was going with I use voltive candles on but this is much better!!!!
Thank you so much! Votives are very pretty, but these are just easy!
Best
Rhonda
Thank you so much for sharing
You are so clever and crafty! I definitely want to do this! Thanks for sharing.
Ahh, thx so much for dropping by
What a great idea! i have a Few chande hanging outside that im going to transorm ????❤️
Wonderful!! this is so easy and super cute at night. I love that I don’t have to light candles to get this look.